
TeeChat OpenAPI is generally available — connect WorkBuddy in a few steps
TeeChat OpenAPI is now generally available. In tools like WorkBuddy, set the OpenAI-compatible base URL to https://openapi.teechat.ai/v1 and paste a TeeChat API key. You do not need a TeeChat-specific SDK.
Requests are handled inside TeeChat’s confidential computing service: the TLS connection terminates inside measured secure hardware, user data appears in plaintext only briefly inside that hardware, and you can optionally verify OpenAPI. This is the convenient path for everyday AI tools. TeeChat’s own chat app uses a stronger, app-native confidential path when you need that product experience — the two are complementary, not the same.
This post shows how to connect Tencent WorkBuddy.
Use this chat model id exactly: Qwen/Qwen3.8-27B.
When to use OpenAPI
| Use TeeChat OpenAPI when… | Prefer TeeChat chat when… |
|---|---|
| Your tool only needs a base URL + API key | You want the full TeeChat app experience |
| You integrate agents, IDEs, or RAG stacks | You want conversations in your own folders |
| You want an OpenAI-compatible backend on confidential hardware | You want in-app verification of conversation encryption |
Before you start
- You are signed in to TeeChat.
- WorkBuddy is installed.
- You will create a dedicated TeeChat API key labeled for WorkBuddy.
1. Create an API key in TeeChat
Open TeeChat (desktop or web) → Settings → General → Account → API keys.
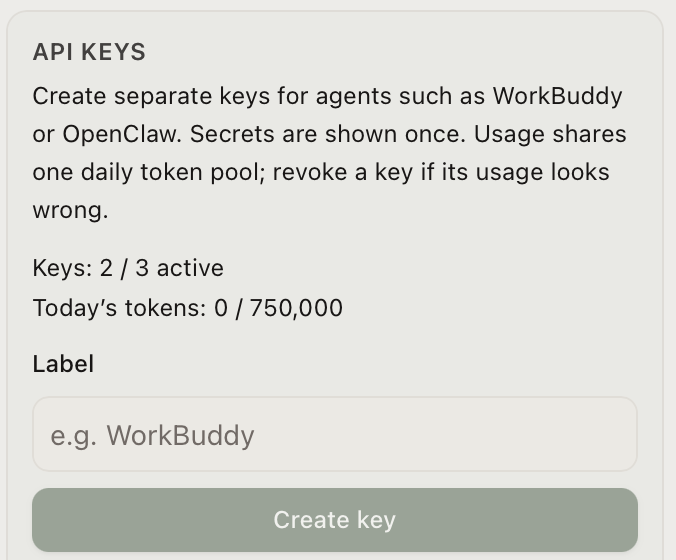
- Enter a label such as
workbuddy. - Click Create key.
- After creation, the full
sk-…is shown once in the settings panel — click Copy, store it somewhere safe, confirm you saved it, then click Done.
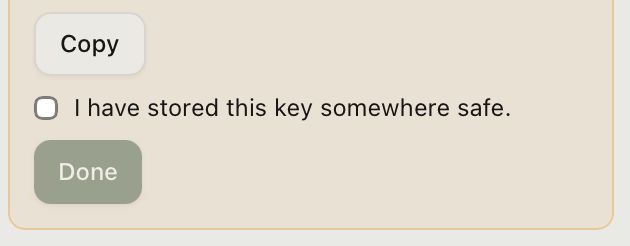
The full key is shown only once. The server does not keep recoverable plaintext; if you did not save it in time, it cannot be read again — revoke it and generate a new one.
Usage from all keys on the same account shares one token pool; using separate keys lets you revoke one key without affecting the others.
2. Add TeeChat in WorkBuddy
Open WorkBuddy → Settings → Model → add a model → choose Custom.
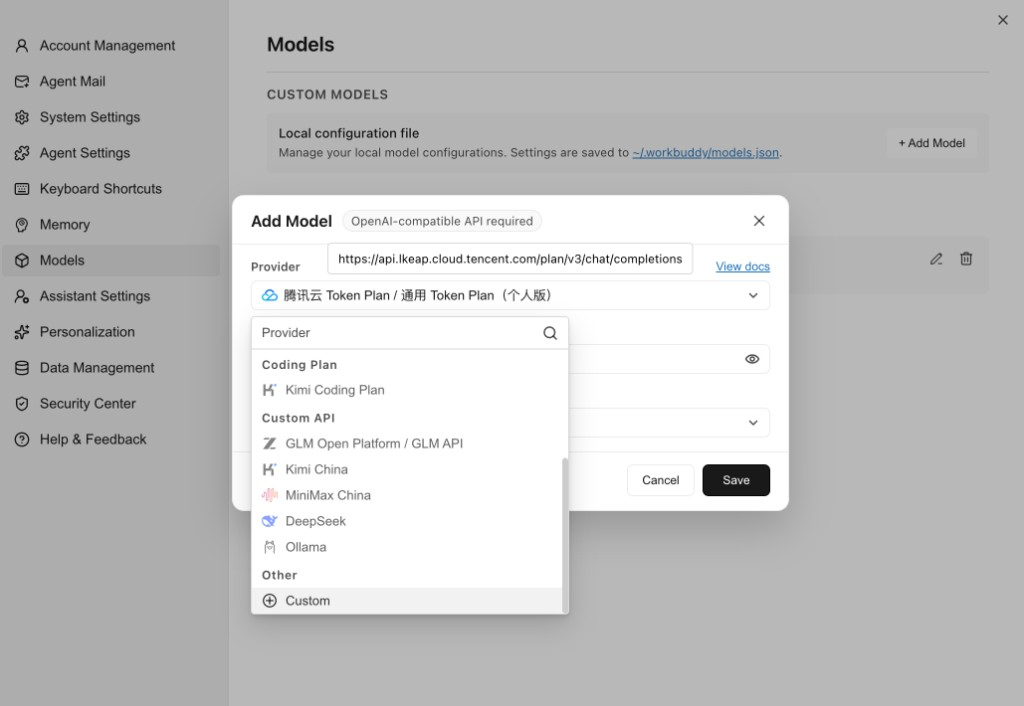
Fill in the form to match this table:
| Field | Value |
|---|---|
| URL | https://openapi.teechat.ai/v1 |
| API Key | The TeeChat sk-… you saved |
| Model name / id | Qwen/Qwen3.8-27B |
| Context window | 65536 on Standard · 262144 on Pro / Pro+ / Team (engine window; not an SLA) |
| Tool calling | Leave off until you confirm the model supports WorkBuddy’s tool format |
Use the base URL …/v1. WorkBuddy appends the chat path for you. The key is expected to be stored locally by WorkBuddy on your device.
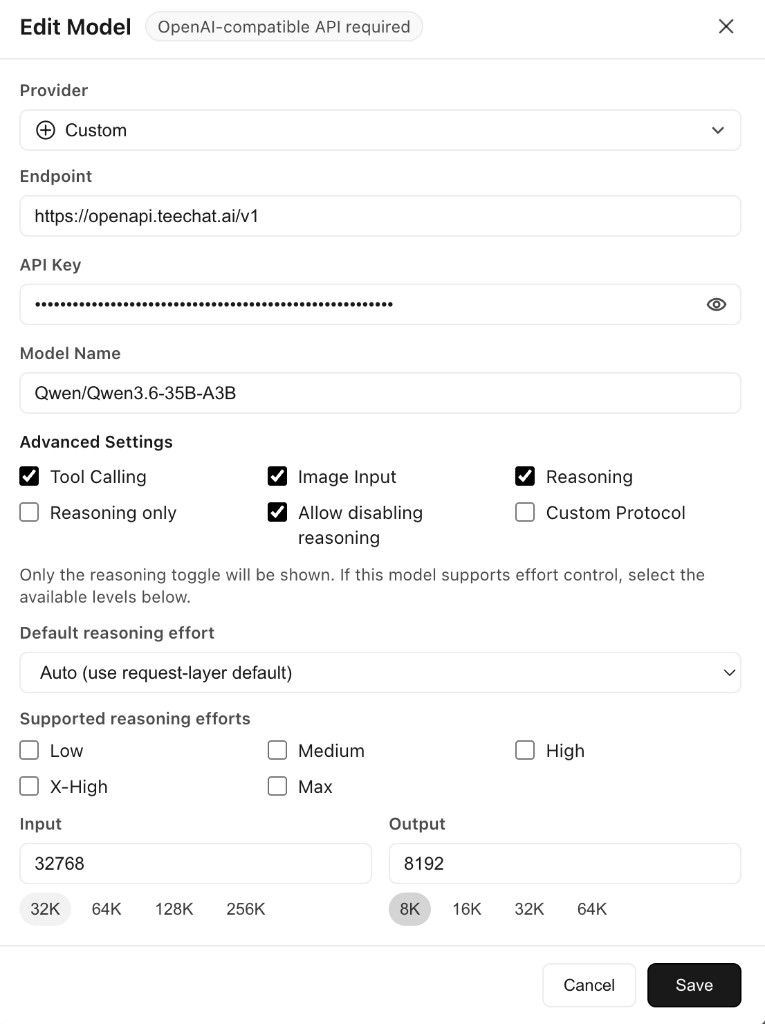
Save.
3. Send a short test message
In WorkBuddy’s model picker, select the TeeChat model you just added and send a short message (for example, “Hello”).
A normal reply means the integration works.
Practical tips
- One key per tool. Label keys in TeeChat; revoke the matching key if a laptop is lost.
- Quotas. OpenAPI usage draws from your account’s API token pool (limits depend on your plan).
- Context window. Hosted OpenAPI is 32K on Free, 64K on Standard, and has no subscription cap on Pro / Pro+ / Team (engine window 256K, not an SLA). If your tool asks for a context size (for example WorkBuddy), type the table number for your plan. Team seats match Pro.
- Model ids can change. Today’s chat model is
Qwen/Qwen3.8-27B; update the WorkBuddy field if we publish a new id. - Verify when you need proof. Security-minded users can verify OpenAPI. Everyday WorkBuddy use does not require that step.
Also: OpenClaw
WorkBuddy is a polished workplace agent with OpenAI-compatible chat models. OpenClaw is a popular open agent shell — and it can use TeeChat for both the main chat model and memory-search embeddings on the same https://openapi.teechat.ai/v1 base URL.
Step-by-step: Run OpenClaw on TeeChat OpenAPI.
Links
- Verify OpenAPI: how-to guide
- TeeChat chat: https://chat.teechat.ai
- Download desktop: https://www.teechat.ai/download
- WorkBuddy model docs: Model configuration
Revision log
- Chat model id → Qwen/Qwen3.8-27B
- OpenAPI context: Standard 64K; Pro/Pro+/Team 256K engine window (not an SLA).
- Link the published OpenClaw OpenAPI setup guide.